Step by Step Guide
- Start with a thorough warm-up, including hip-opening poses like Pigeon Pose, Lizard Pose, and Shoulder stretches.
- Warm up your wrists, shoulders, and spine with gentle movements.
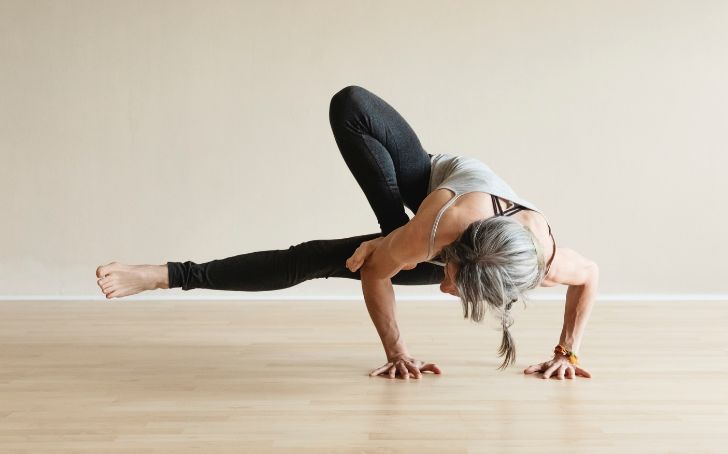
- Start in a low Frog Pose, bringing your knees wide apart, aligning them with your ankles.
- Place your hands shoulder-width apart in front of you.
- Bring your right shoulder under your right knee, externally rotating your right hip.
- Press your right shoulder against the inner right knee.
- Place your hands shoulder-width apart on the mat, fingers spread wide for stability.
- Ensure your wrists are aligned with your shoulders.
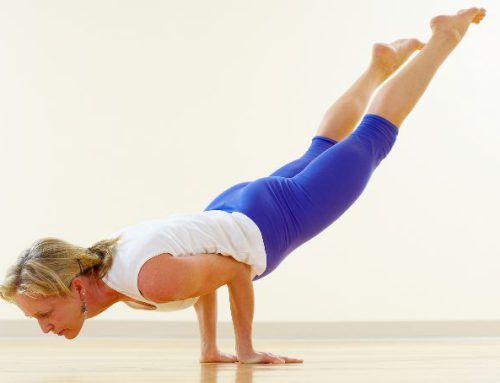
- Lift your hips off the ground, engaging your core and pressing into your hands.
- Extend both legs straight back, keeping them parallel to the floor.
- Thread your right arm through the space between your right knee and the floor.
- Reach your right arm underneath your body and bring it out on the left side.
- Bend your left knee and bring your left heel toward your left glute.
- Reach back with your left hand, aiming to clasp hands with your right hand.
- Twist your torso to the left, opening your chest.
- Engage your core and find your balance in this twisted position.
- Turn your gaze upward, keeping your neck aligned with your spine.
- Breathe deeply and hold the pose for 15-30 seconds.
- Release the pose by gently lowering your legs and returning to Frog Pose.
- Repeat on the other side.
Benefits of The Grasshopper Pose (Parivrtta Bhekasana)
- Hip Flexor Stretch: Parivrtta Bhekasana deeply stretches the hip flexors.
- Shoulder Opening: The pose opens the shoulders and chest.
- Core Engagement: Engages and strengthens the core muscles.
Tips for Advanced Practitioners:
- Hip Flexibility: This pose requires open hips, so ensure your hips are adequately warmed up.
- Arm Strength: Strengthen your arms and wrists with poses like Plank and Downward-Facing Dog.
- Focus on Alignment: Pay attention to the alignment of your wrists, shoulders, and hips to maintain stability.
- Avoid this pose if you have any wrist, shoulder, or hip injuries.
- If you’re new to the pose, practice under the guidance of an experienced yoga instructor.
- Listen to your body, and do not force the pose. Progress gradually based on your comfort and flexibility.

Leave A Comment